How Can We Help?
Managing Amenity Reservation
Overview
RunHOA allows administrators and users to set up and manage reservations for various community amenities, such as swimming pools, tennis courts, gyms, and more. Below are the steps and guidelines for effectively managing amenity reservations within RunHOA.
Accessing the Amenity Management Module
To begin managing amenity reservations:
- Navigate to the Amenities section on the left sidebar of your dashboard.
- In the Amenities section, you will find options to:
- Reserve Amenity: For making new reservations.
- Amenity Setup: For adding or configuring amenities.
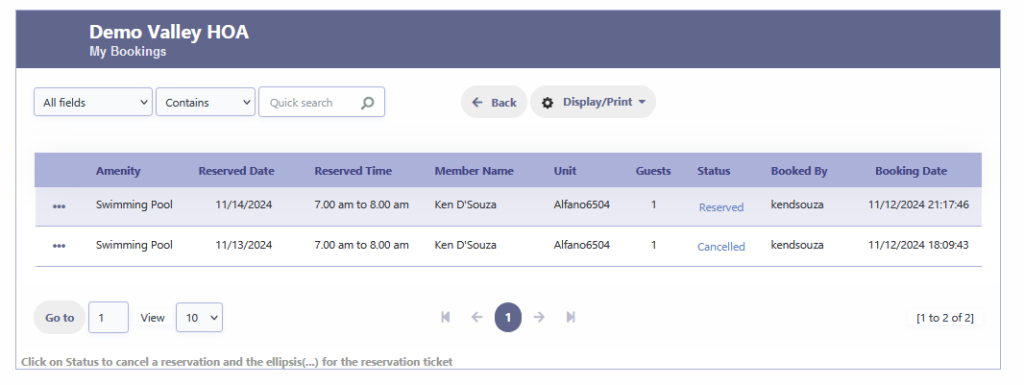
- My Bookings: To view your personal reservations.
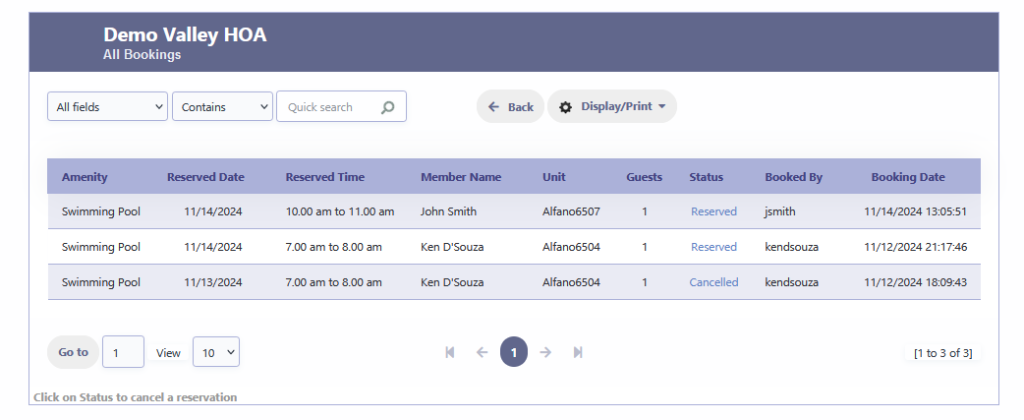
- All Bookings: To view all reservations across the community (admin access only).

Setting Up an Amenity
Admins can set up new amenities for reservation through Amenity Setup.
- Click on Amenity Setup.
- Click on Add New to create a new amenity.
- Fill in the details, including:
- Description: The name of the amenity (e.g., Swimming Pool, Tennis Court).
- Location: The physical location or address of the amenity.
- Add Messages/Rules: Outline rules and guidelines for using the amenity.
- E.g., “Please take a shower before entering the pool” or “No glass containers allowed.”
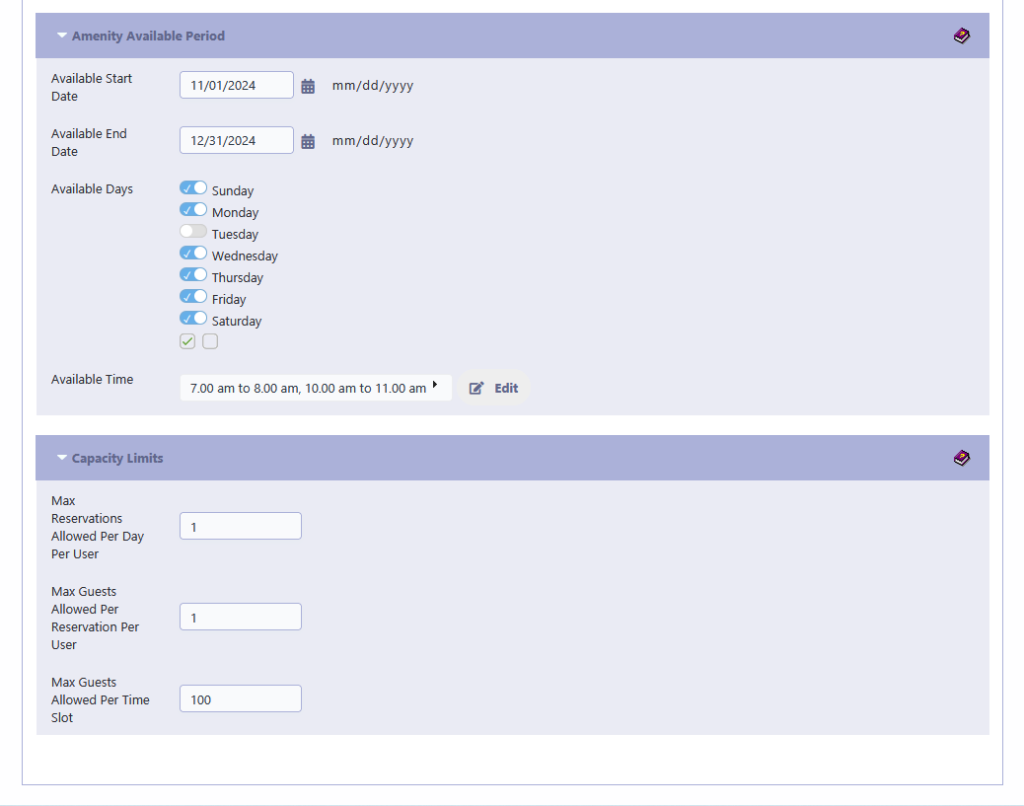
- Configure Available Periods:
- Set the Available Start Date and End Date.
- Select Available Days (e.g., Sunday to Saturday).
- Specify Available Times if the amenity is only accessible during certain hours.
(Click on Edit to create the various Amenity time schedules i.e click on Add New and then the checkmark to save the time))
- Set Capacity Limits:
- Max Reservations Allowed Per Day Per User: Limit the number of daily reservations.
- Max Guests Allowed Per Reservation: Set the maximum guests a user can bring.
- Max Guests Allowed Per Time Slot: Define the total capacity for each time slot.
- Save the amenity setup by clicking Save.


Making a Reservation
To reserve an amenity:
- Go to Reserve Amenity.
- Select the desired amenity from the dropdown list.
- View Messages/Rules for the selected amenity.
- Choose a Reservation Date and Reservation Time from the available options.
- Enter the Number of Guests.
- Click Submit to confirm your reservation.

Reservation Confirmation
After submitting, a reservation confirmation will appear. You can print or download a Reservation Ticket with details of your booking from My Bookings

Viewing and Managing Your Reservations
You can view and manage your bookings under My Bookings:
- My Bookings: Displays a list of all your reservations.
- All Bookings (Admins only): Allows admins to view all community bookings.


Canceling a Reservation
- In My Bookings or All Bookings, click on the reservation’s Status to open the cancellation screen.
- Choose Yes to confirm cancellation, and click Proceed With Cancellation.

Printing or Exporting Reservation Details
Admins can export or print reservation details:
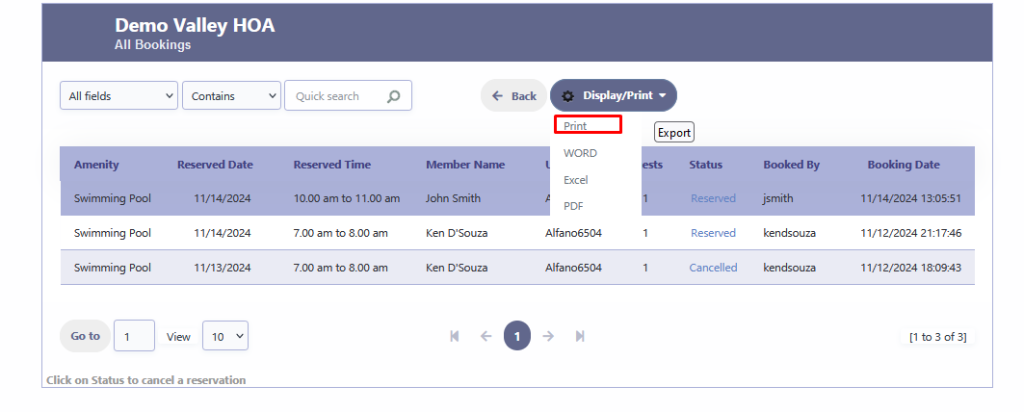
- Go to Display/Print in the My Bookings or All Bookings sections.
- Select Export for downloading as a CSV file, or choose Print for a printed record.
