How Can We Help?
How to setup Custom Request Types?
To create Custom Request Types in RunPTO, follow these steps:
Enable Custom Request Types:
- Navigate to the Custom Options Settings in Administration/Setup
- Locate the option labeled “Use Custom Request Types.”
- Activate or enable this option to allow the creation and utilization of custom request types.
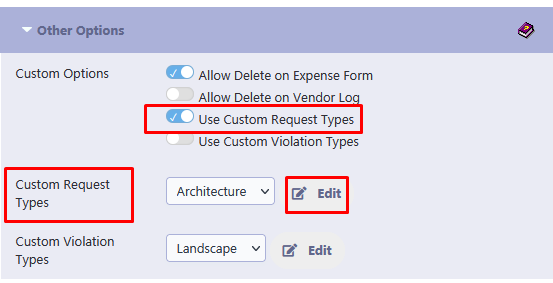
Access the Custom Request Types Editor:
- After enabling the feature, find the “Custom Request Types” column.
- Click on the “Edit” button associated with Custom Request Types to open the editor interface.
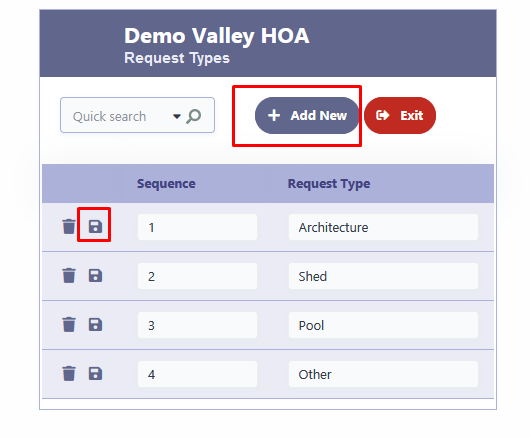
Create Custom Request Types:
- In the editor, you will see options to add new request types.
- For each new request type, provide a descriptive name that clearly identifies its purpose.
- Enter the sequence in which you want the request types displayed on the Request Form.
- Save each request type by clicking on the disk icon..